Quickstart
Workspaces
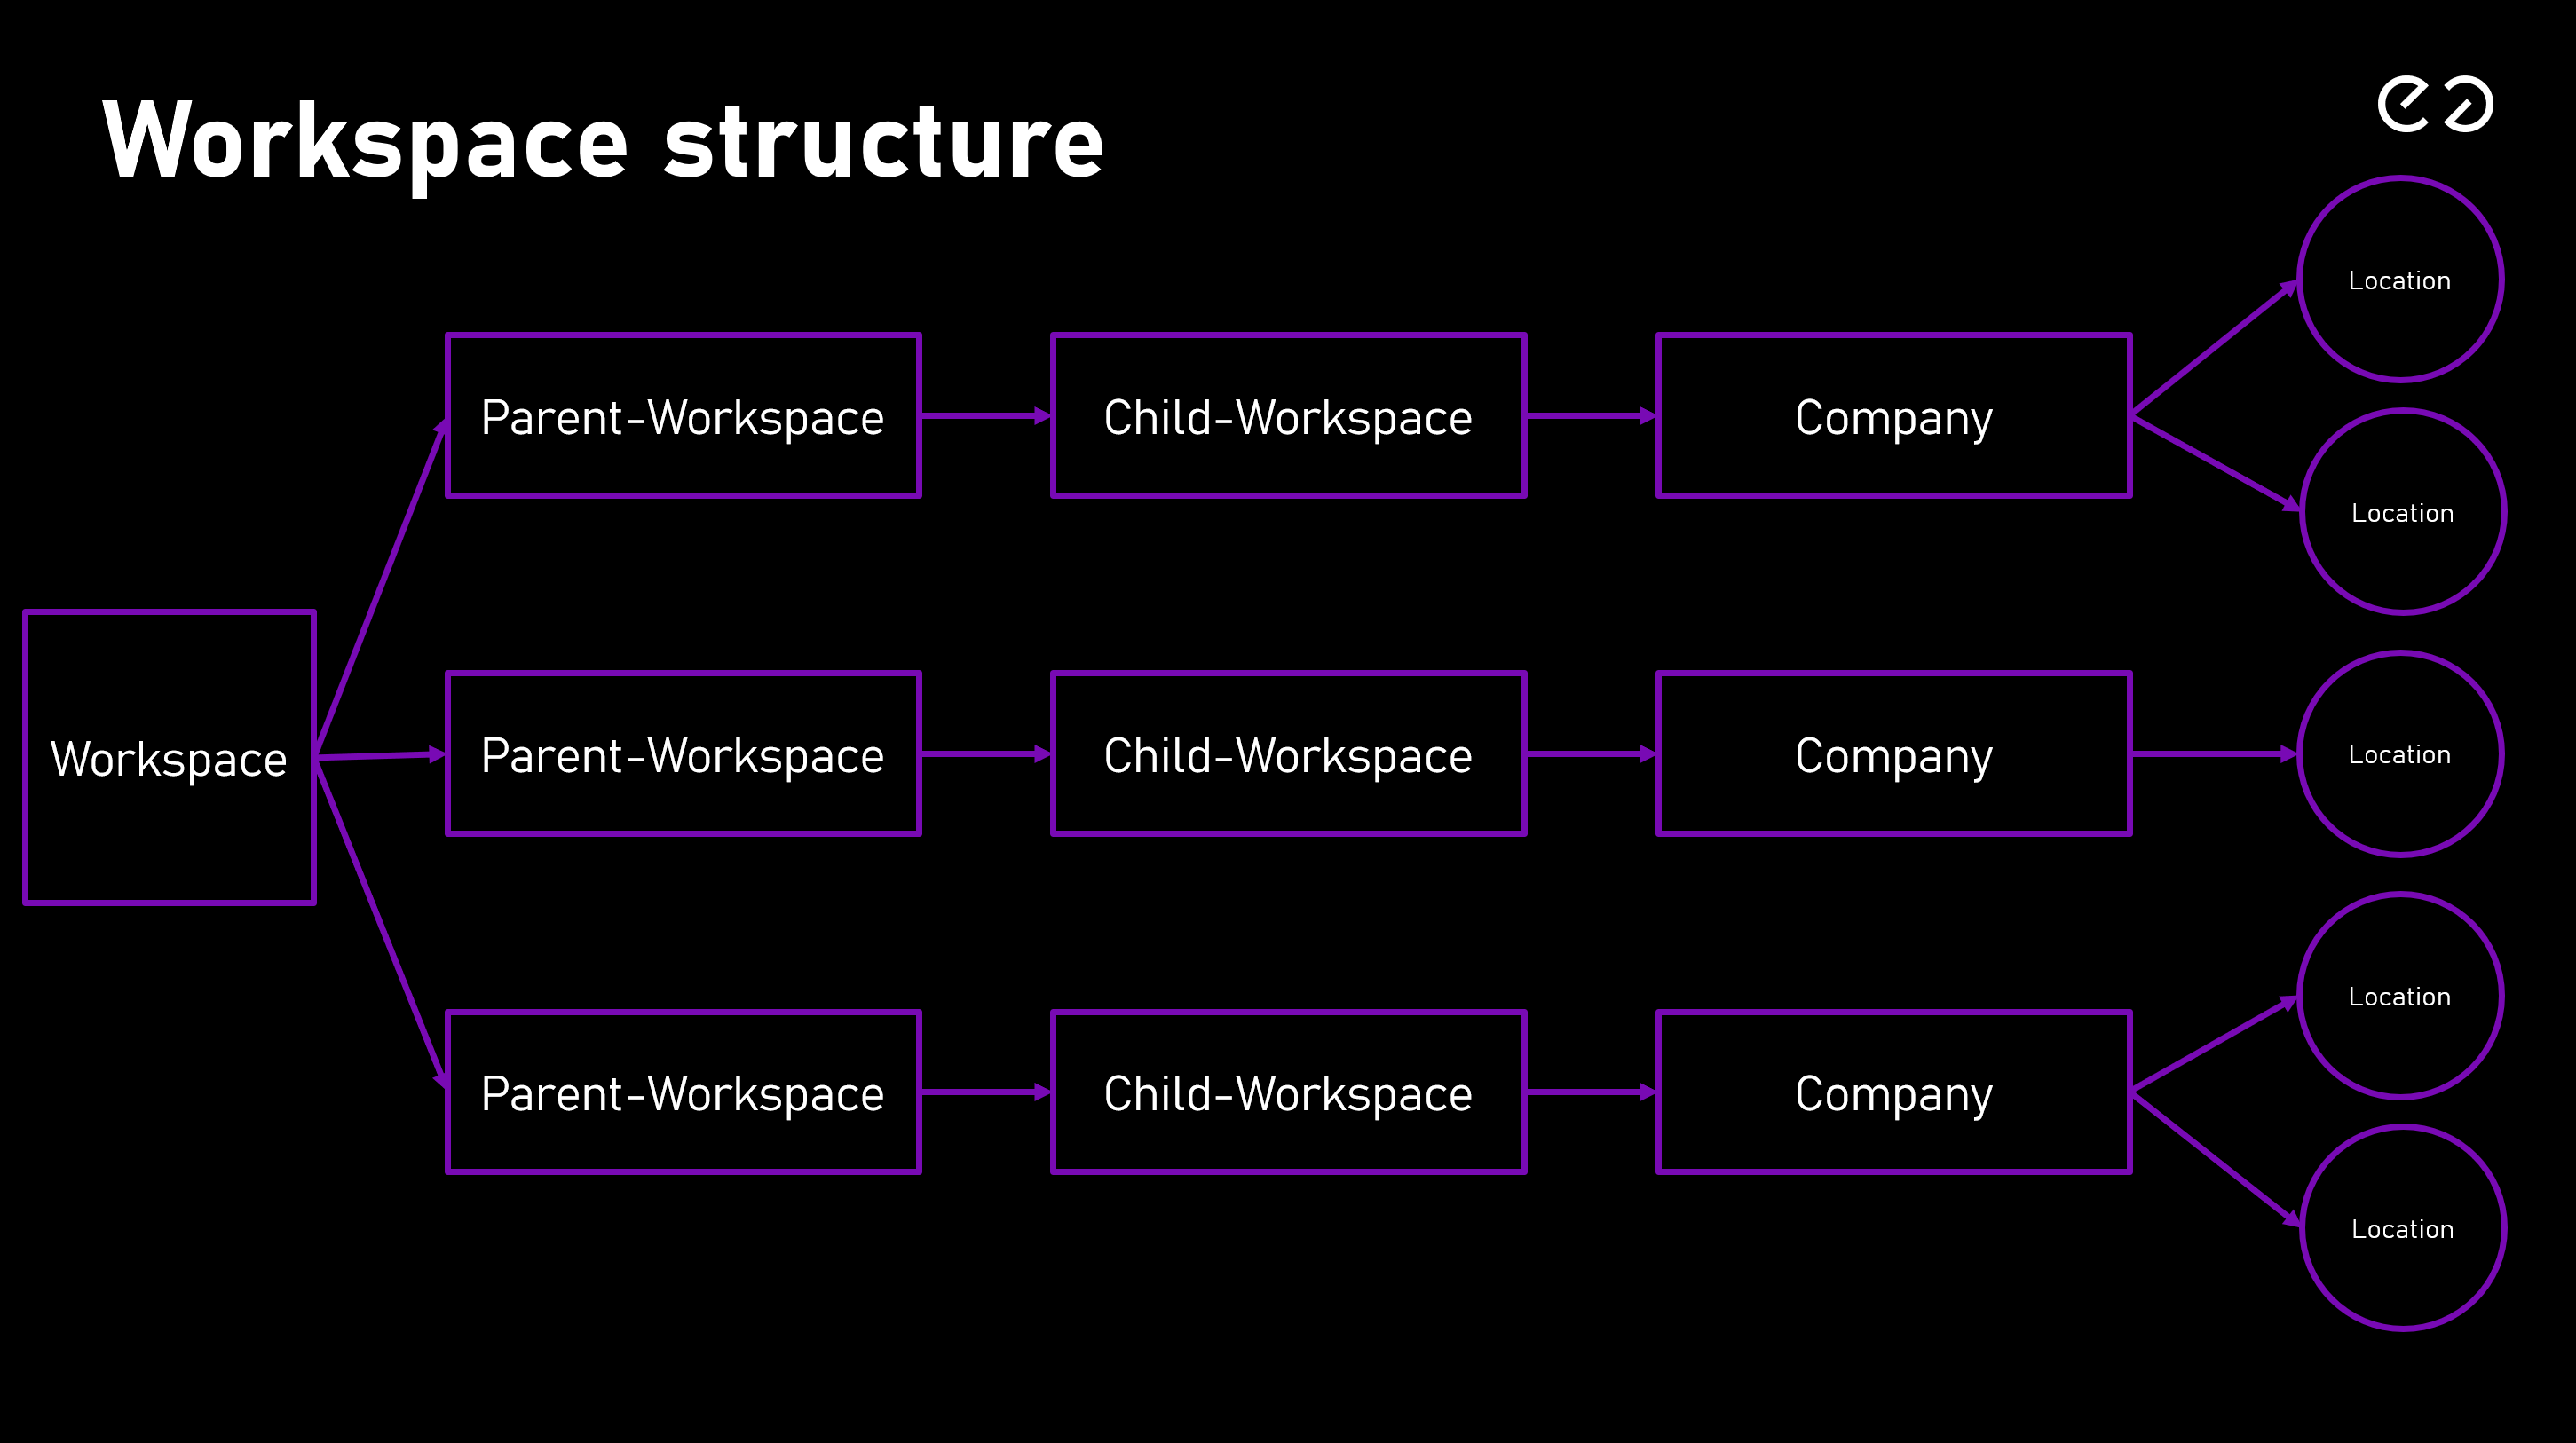
A workspace is an entity used to structure customers with multiple clients. It is only required when a customer manages more than one client and needs to separate them into individual companies.
In the hierarchy shown above, there is a workspace that represents Excelsea and serves as the parent workspace for all related parent workspaces.
Additional workspaces can be created as child workspaces below an Parent Workspace. Before creating a workspace, always verify the correct location in the hierarchy where it should be added. This ensures that the workspace is assigned to the appropriate parent company or client structure.
The process for selecting the correct location is described in the tutorial below.
Creating an Workspace:
- Step: Navigate to the Workspaces tab after logging into your account. You can find it in the top-left corner. After clicking the Workspaces tab, all workspaces available to you will be displayed, depending on your account permissions.
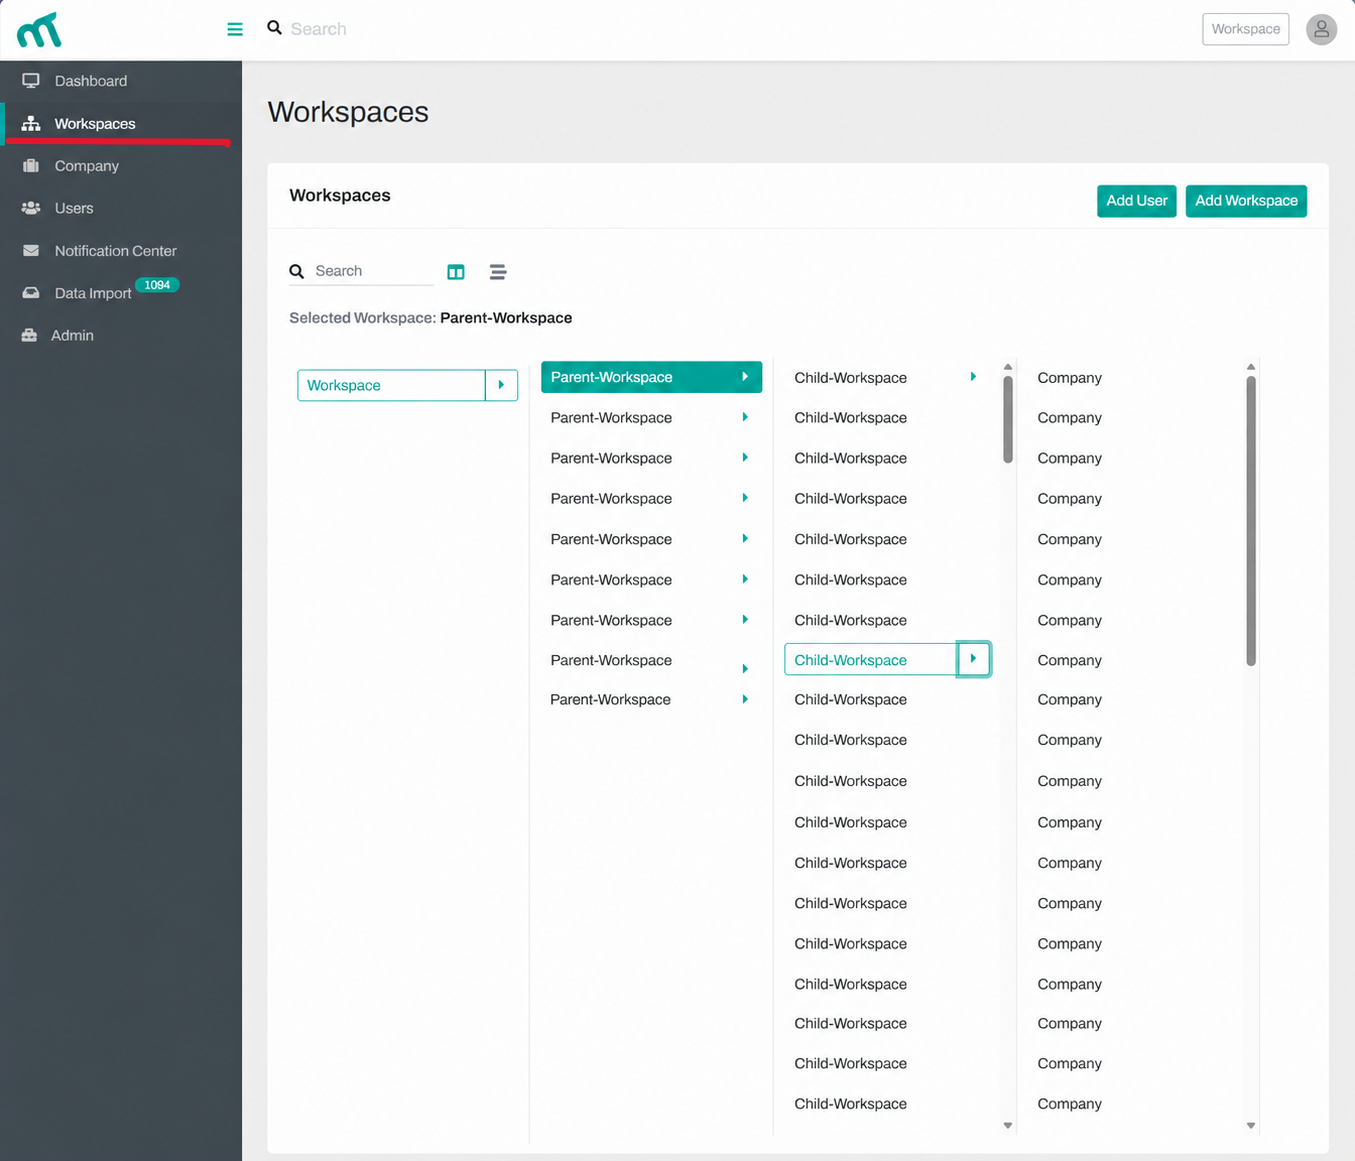
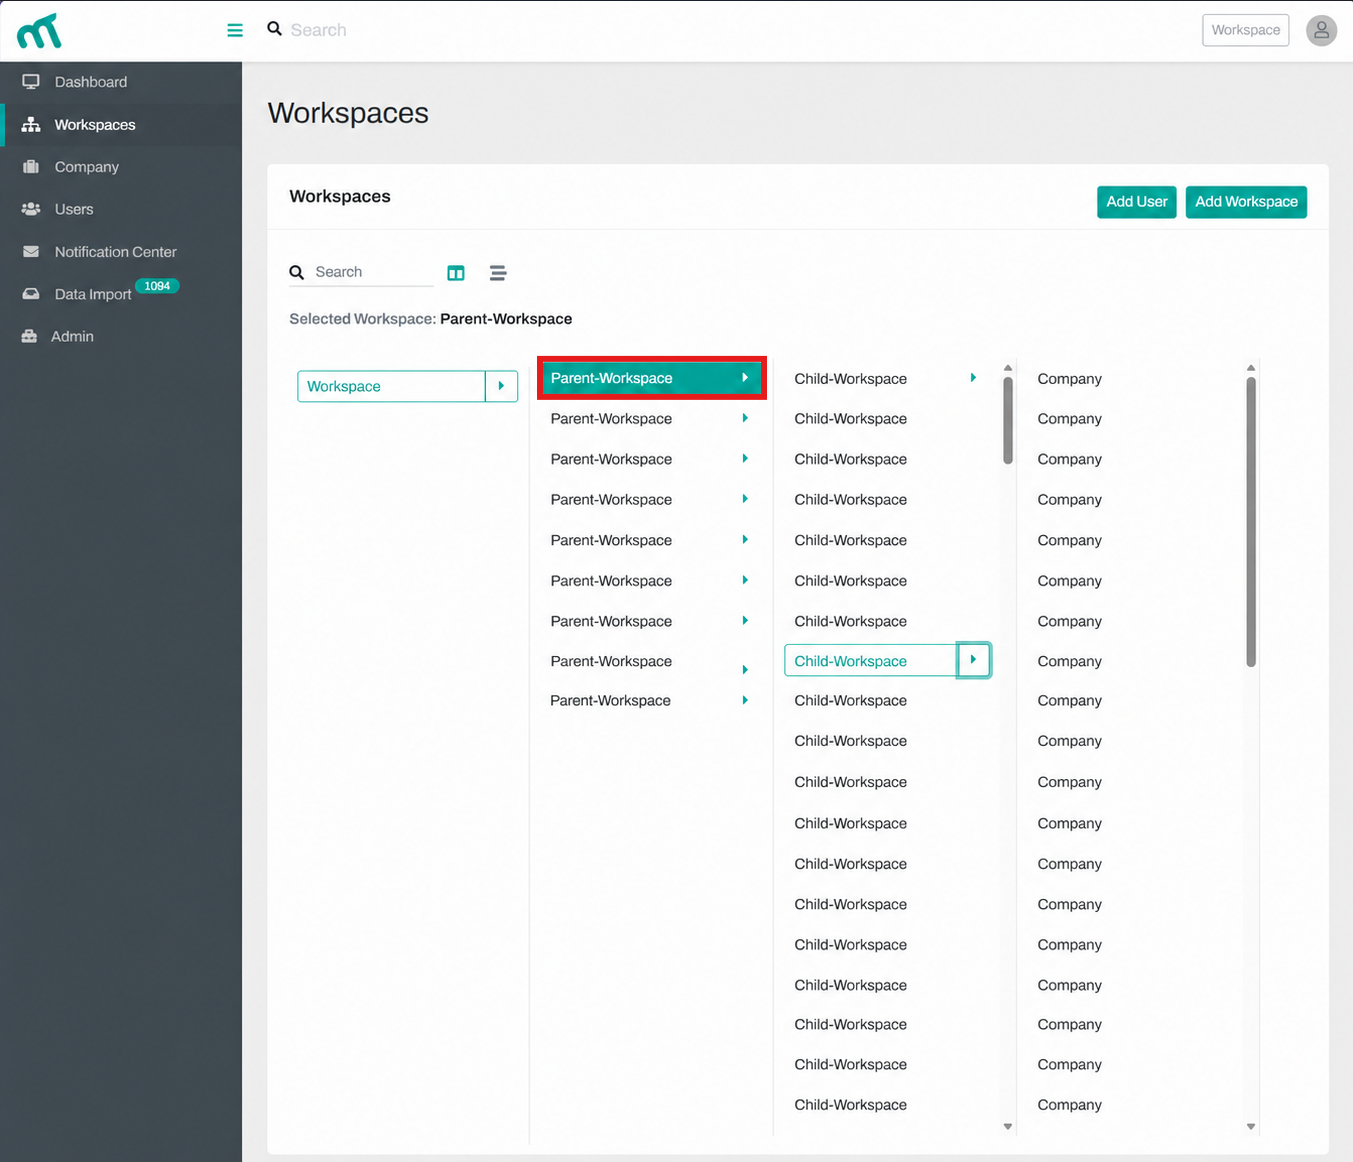
- Step: By selecting the workspace in which the new workspace should be created, you determine where it will be placed in the hierarchy. If you cannot find the required workspace, skip the selection step and continue with the next step.
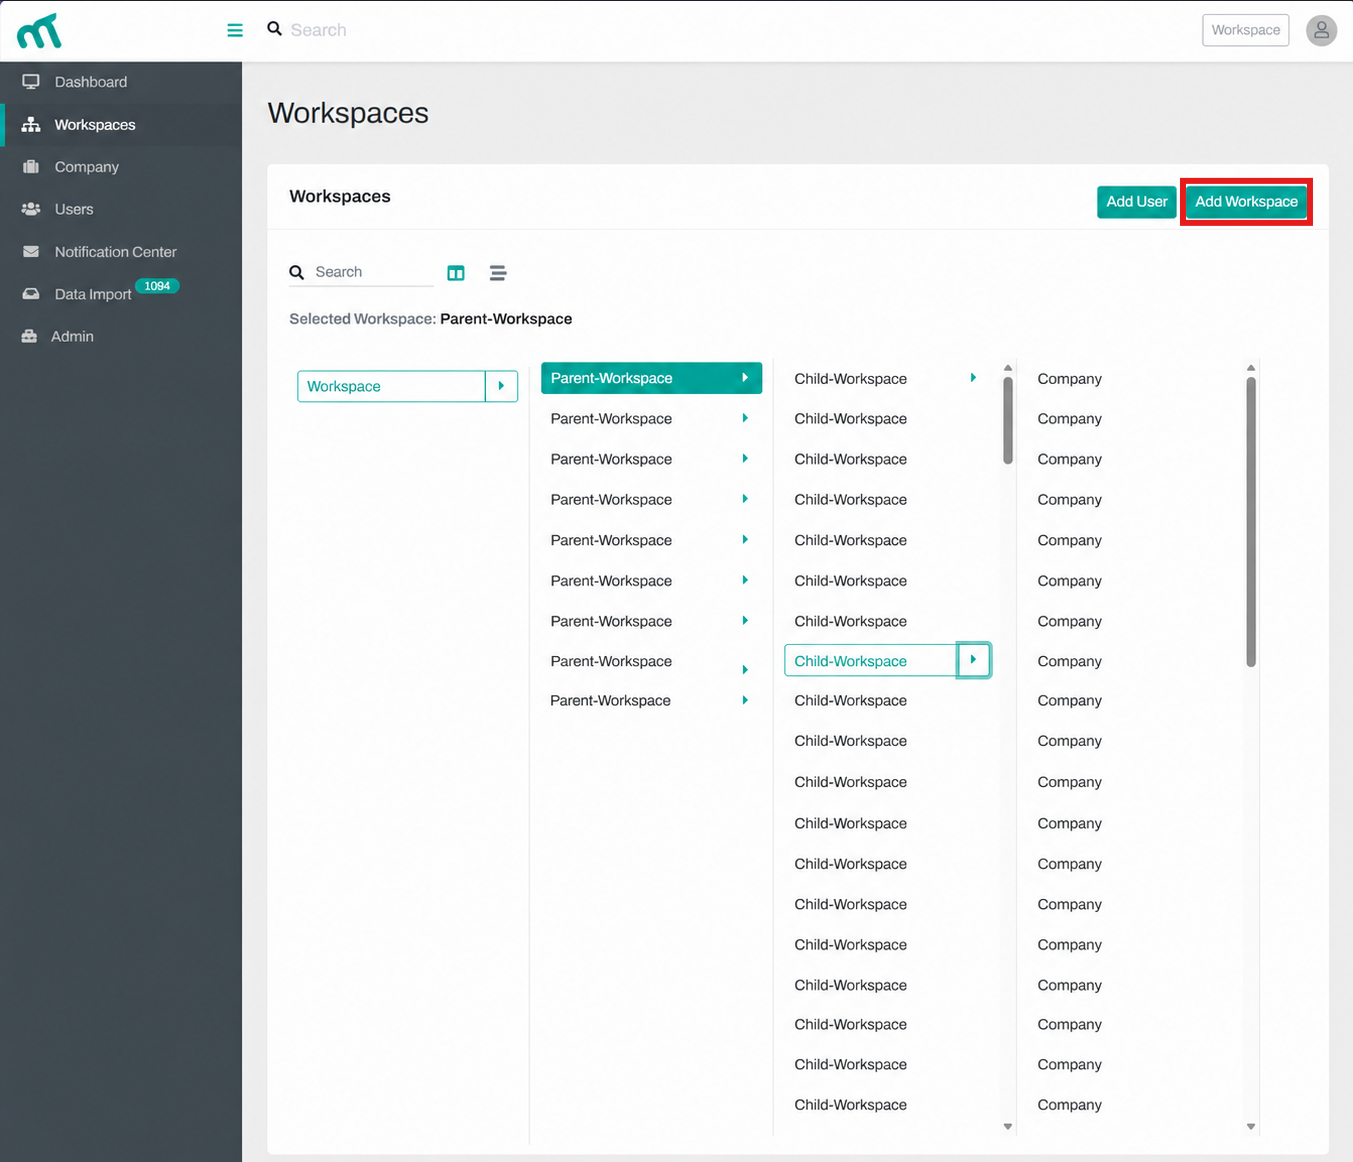
- Step: You can now start adding the workspace by clicking the Add Workspace button in the top-right corner.
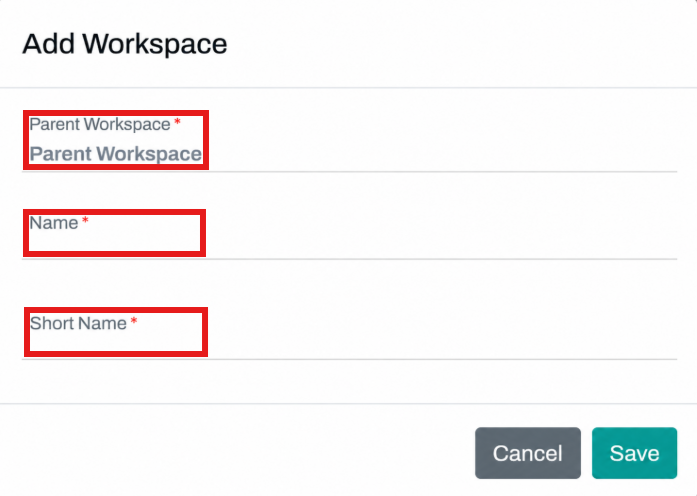
- Step: A pop-up window will appear where you can enter the workspace name and a short name. You can also verify that you are adding the new workspace to the correct parent workspace. The new workspace will be created within the workspace whose name is displayed in the Parent Workspace field.
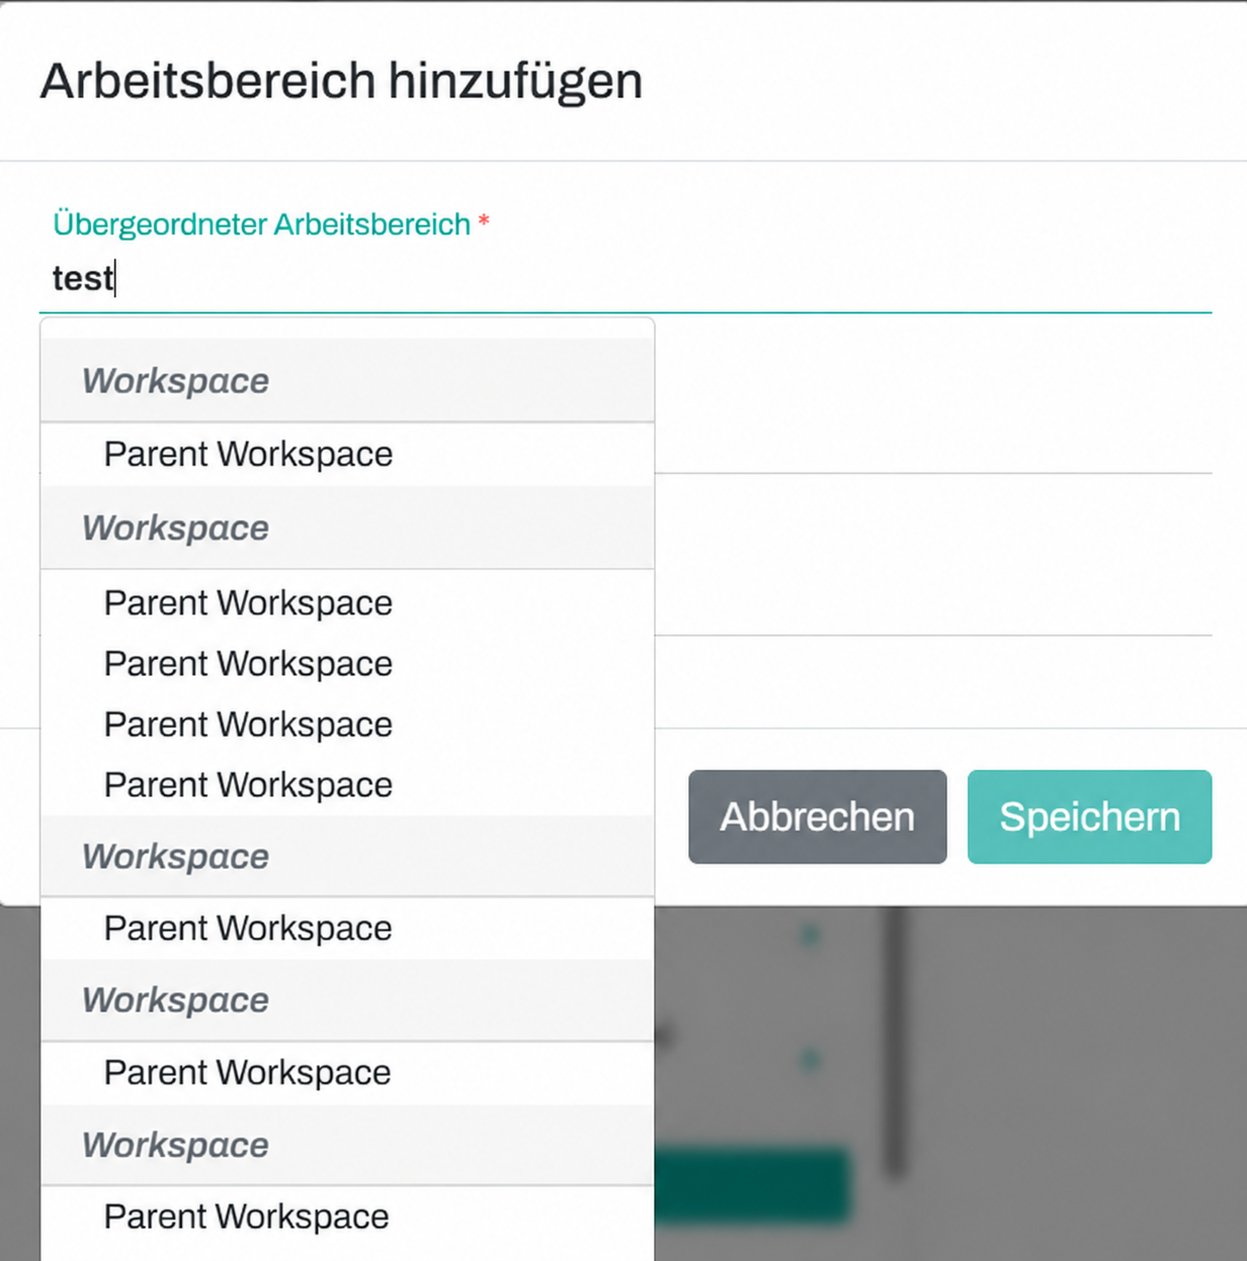
- Step: If you did not select a workspace in the previous step, you can now search for the required parent workspace by clicking the Parent Workspace field and typing its name.
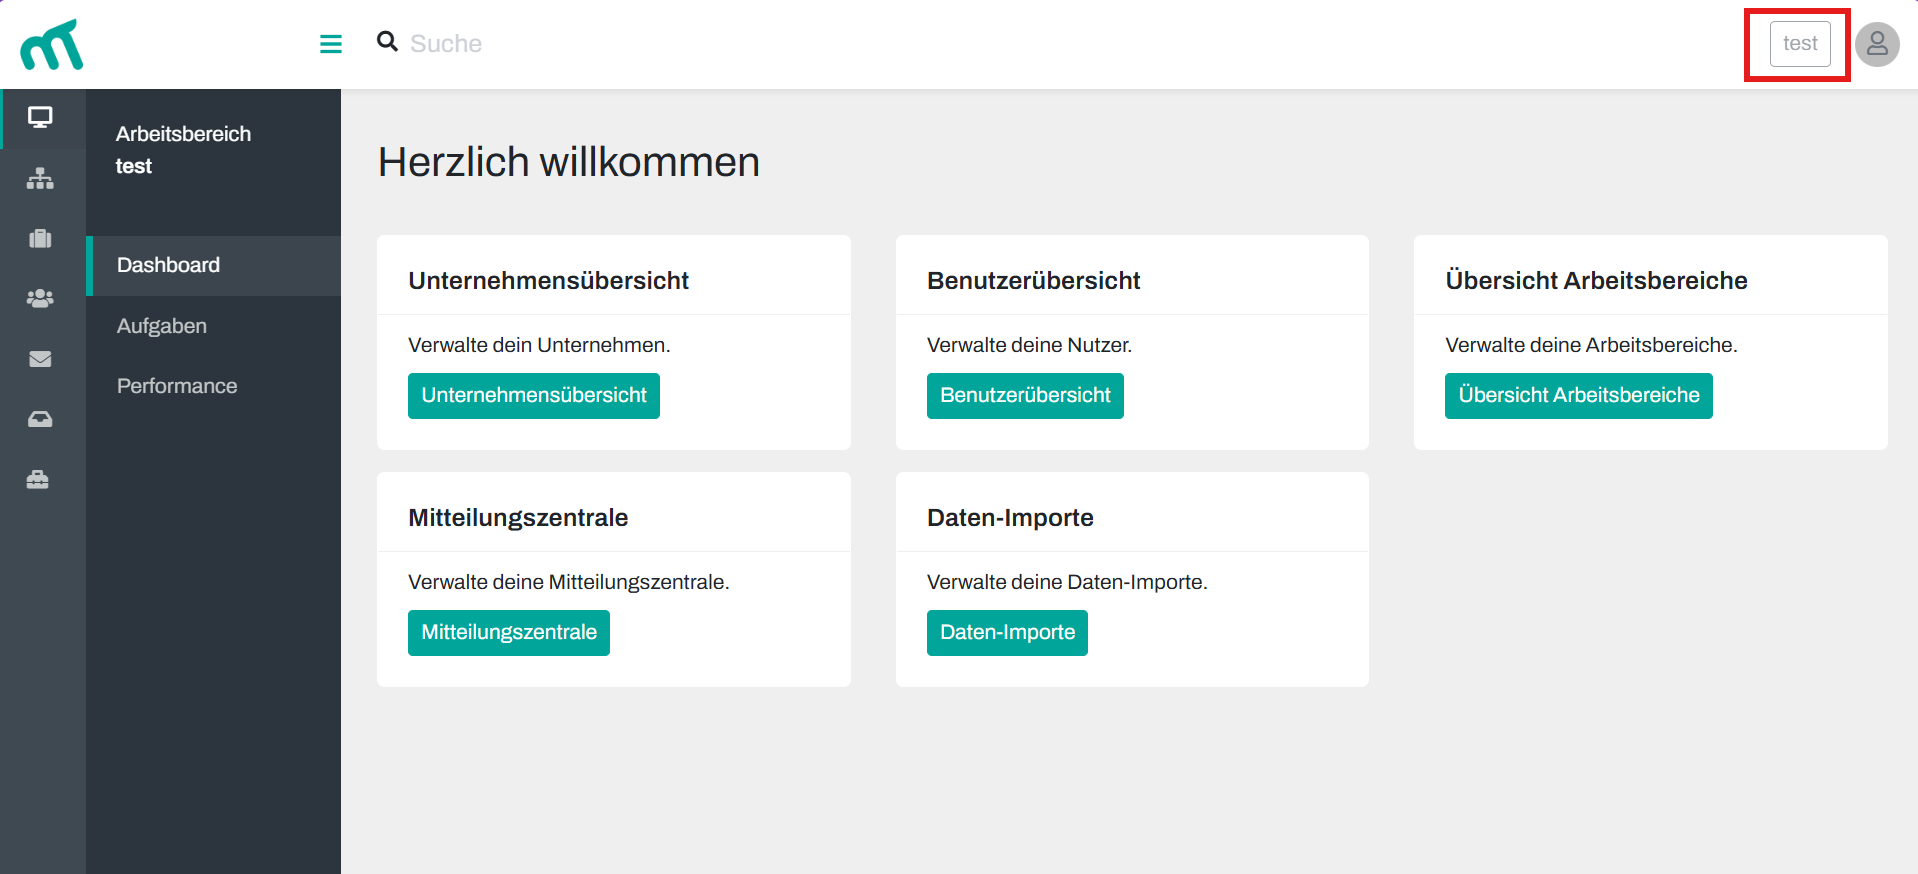
- Step: After entering the required information, the Save button will become active. Click Save to store the entered data. The pop-up window will close automatically, and the workspace overview will be displayed. The workspace name will appear in the top-right corner next to your user profile picture.
Creating a Customer
A Customer (also called a Company) represents your business in Markee.
Detailed walkthrough:
Creating a Location
A Location is a single place your business operates from. Every customer needs at least one.
Detailed walkthrough:
Fill in the Required Fields
Markee needs a few key details before a listing can go live. These are mandatory:
- Open your location.
- Fill in:
- Address — the full street address
- Phone number — the main contact number
- Category — the primary category that describes your business
- Save.
Why these matter: Without an address, phone number, and category, listings can't be activated, and many publishers will reject the data. If you see a warning that the subscription can't be activated, a required field is usually missing. You should now see the location's required fields marked as complete.
Creating Users and Assigning Permissions
A User is anyone who can log in to Markee. There are a few ways a user comes to exist, depending on how the workspace is set up:
- Created by a partner or manager — most commonly, a partner or admin sets up the user and sends an invitation to their email address.
- By API — for partners with a system integration, users are created automatically through the API as part of their own onboarding flow.
If you're an end customer, your access was most likely set up for you this way, and you can skip ahead. If you're a partner or admin setting up access for others, here's how it works.
To create a user:
- Go to the Users section.
- Click Add User.
- Select the Workspace the user is to be created for.
- Enter the person's email address. This is the identifier they'll use to log in.
- Save. The user receives an invitation by email to set up their access.
Assigning permissions: Each user is given a role that controls what they can see and do. Common roles include:
- Administrator — full access to the workspace
- Manager — manages assigned companies and locations
- Self-Service user — limited access, typically an end customer managing their own data Permissions can be scoped to specific companies or locations, so a user only sees what's relevant to them. This is especially useful in larger workspaces with many customers.
Tip: Give each user the narrowest role that still lets them do their tasks. It keeps larger workspaces clean and avoids accidental changes to data outside someone's responsibility.
You should now see the new user listed, with their assigned role.
Creating a Contract and Assigning a License
A Contract defines which products a customer can use, and a License is the actual access to one of those products at a location. This step is usually handled by a partner, since it ties into how products are sold and billed.
Note for end customers: You normally don't create contracts or assign licenses yourself, your partner does this for you. If a product you expect isn't available, this is the step to ask them about. How it works:
- Start from an Offer. An Offer is a template that bundles the products available to a customer. Your workspace will have one or more offers set up.
- Create the Contract. From the offer, create a contract for the customer. The contract defines which products they're entitled to and for how long.
- Assign the License. With the contract in place, assign a product (for example, Listing) to a specific location. This creates the Subscription, the live instance of that product at that location.