Create users and assign permissions
You can access the user administration via the menu item "Users". Here you get an overview of all users created in your area and can manage them, add new users or block users. For a better overview, we will explain all 3 sections in these instructions.
Section 1- User overview and create new user
Search user
In this section you can search for a user. You can do this via the user name, first and last name or the e-mail address, or by limiting the work area via the filter function.
All users matching your search details will then also be listed in this section 1. You will also see the status of the user in Markee.
Create user
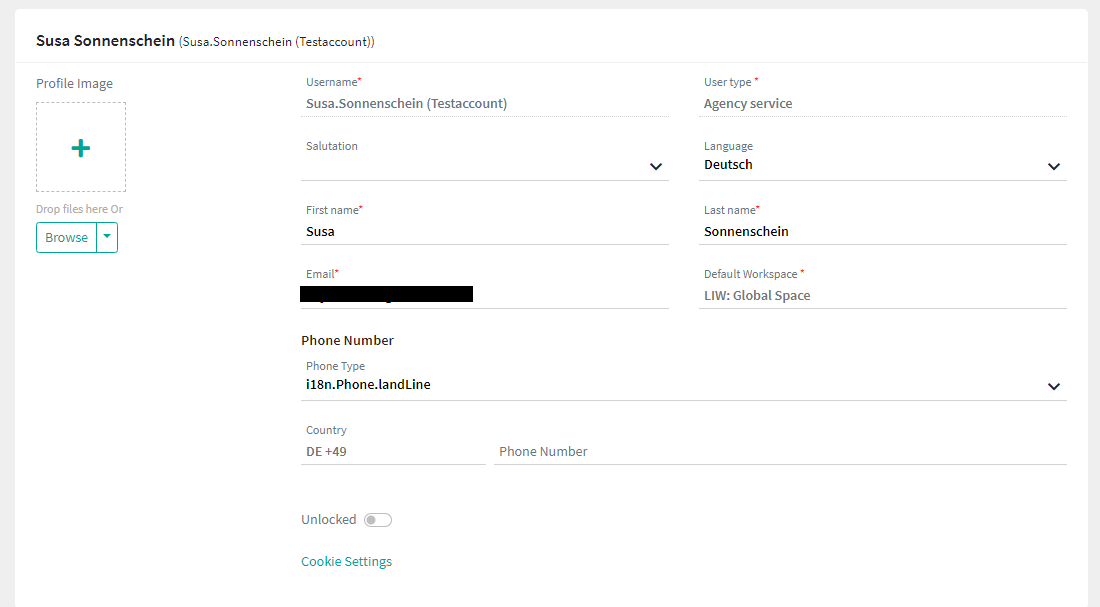
To create a user, click on the button "Add user". You can now enter the details of the user in the following window.
Users can basically be assigned to a workspace, a company or a location. This link is selected when the user is created and cannot be edited afterwards. In this way, you can decide to which "level" a user is assigned. If you want an individual customer to have access to his or her data, the assignment to the respective company makes sense. If you want to give a branch employee of your customer access to his data, the assignment to the corresponding location is the right choice. If you want to give an employee in your company access to all of his customers, the assignment to the work area would be the sensible variant.
You can select whether the user belongs to a workspace, a company or a location via the "Level" field. The workspace, company or location is then selected via the Selection field When you have finished, confirm your entries with "Save". After the user has been created, he or she must be assigned permissions. You can find out how to do this in section 3.
To create a user with a dash in the name, first create it without a dash. Add the dash afterwards.
After the user is created, this user will receive 2 emails from Markee: 1. With this email the user confirms his email address.
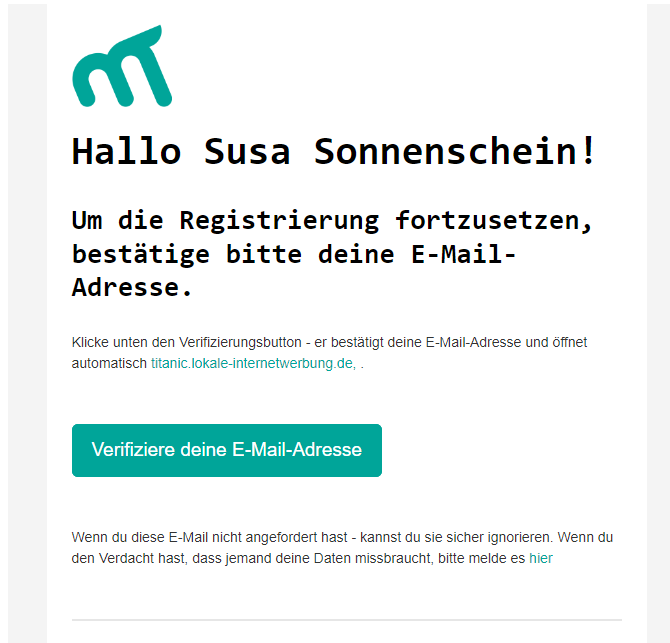
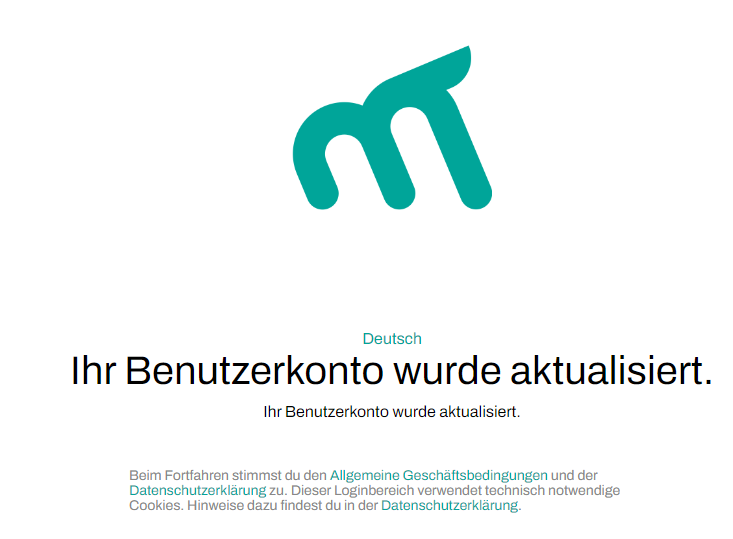
Now a browser window will open and after the confirmation was successful, this will be displayed in the browser.
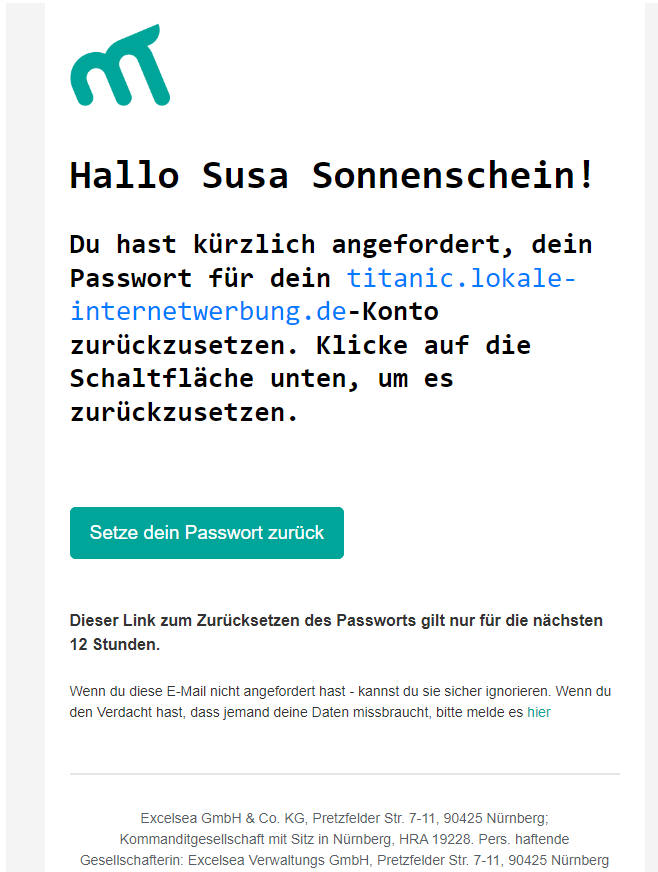
2. Password assignment:
With this email, the user is requested to set the password for his account. To do this, click on the button "Reset your password".
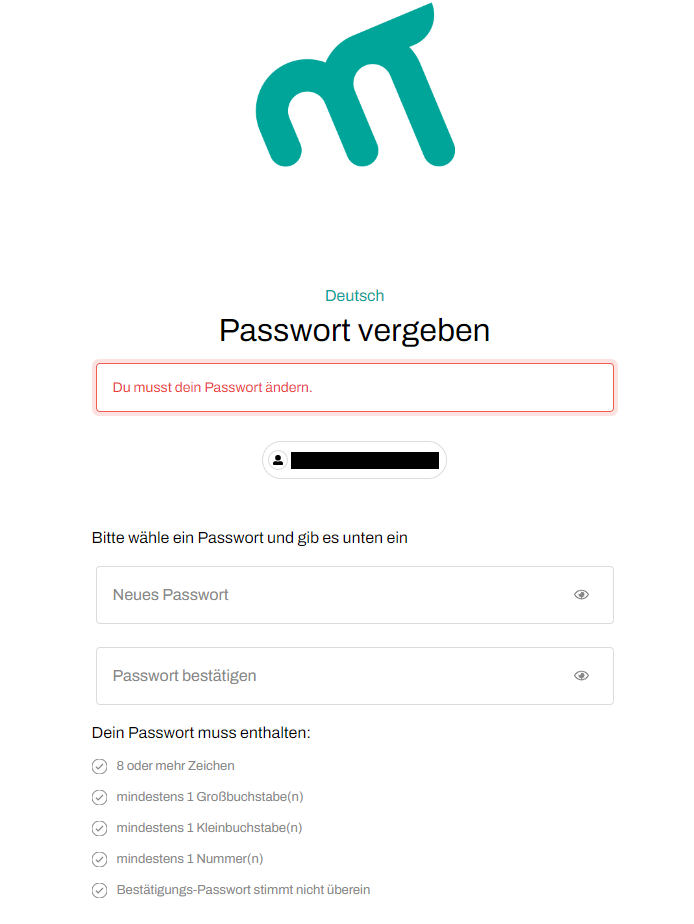
A browser window opens and the user can enter his or her password.
Section 2 - User details
In this section you can see the information about the user and can also set or change various details.
- Name and first name
- Telephone number
- Status:
- If you want to block or deactivate a user, you can block the user in the middle column of the user overview by clicking on the "locked" button.
- The status "locked" prevents the user from logging in. It is not possible to delete a user in Markee.
- Language:
- Currently Markee is user customisable in German, English, Spanish, Estonian, French, Italian, Dutch, Polish, Portuguese and Czech.
- Simply change the language in the middle column of the user overview using the drop-down menu in the Language field.
- User type:
- Self-Service: SelfService User
- Agency Service: Agency Service User
Section 3 - Permissions
After creating the user, he or she initially has no permissions. This must now be assigned to the user.
To assign permissions to the user, click on "Add" in the Permissions column.

Now you can assign the permissions:
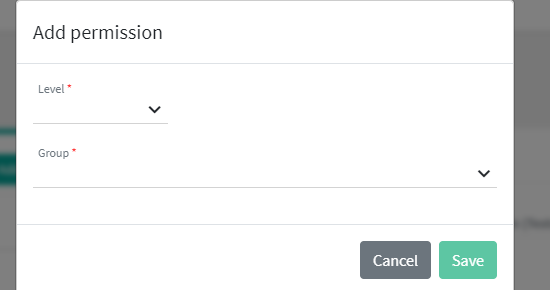
Level and Selection: You define here what the permission is to apply to. This can be either an entire workspace (including subordinate workspaces) or a company (including associated locations) or an individual location.
When a user only has rights for the location, they do not currently see the company dashboard. To do this, the user currently needs rights at the company level.
Group: It defines what kind of permission the user gets for the selected level. The following overview shows the different permission groups. Only the relevant user roles are listed here.
Location and company selection for locations and companies with identical names
In the case of locations and companies with identical names, there is the challenge that you cannot identify them when assigning rights. So that you can still assign the correct location or company, you can also search for and select it with the location ID (when assigning rights at location level) or company ID (when assigning rights at company level).

User roles
Arbeitsbereich Administrator The Arbeitsbereich Administrator has full access to a workspace including subordinate workspaces. This includes adding and editing companies, locations and users. He or she can also assign products to the individual locations and edit the settings of these products. Creating new users is only possible with admin rights at workspace level.
Content Manager The Content Manager has access to a workspace and can see and edit all companies and locations in it. He or she can add new locations in a company, but cannot create new companies. User management is not available for this group.
Content Manager Read-Only This role corresponds to the Content Manager with the restriction that it is read-only.
Can Create Company This is an additional role that can be assigned to a Content Manager so that he or she can also create companies.
Can Delete Can delete sites and companies.
Standortmanager (Site Manager) A Standortmanager only has access to one site. They can edit the data of the location and have read access to the products.
Subscription Zusatzfunktion The user has access to the "Advanced settings" under the products, for example to re-trigger a data synchronisation (Resyn button).
Social Media With this additional function, the user can control social media activities of a company or a location. He can create or delete posts and reply to ratings as well as view statistics. The user can only view the companies and locations, not edit them.
A user can have multiple permissions. The permissions can also refer to different levels (company or location or workspace including subordinate workspaces).
Group permissions
There are two group permissions for partners (since 26.11.2019): 1. Redaktion:
- Content Manager
- Subscription Zusatzfunktion
- Social Media It is not possible to create companies.
2. CSM - Customer Success Manager (can create companies) with the following authorisations:
- Content Manager
- Can create company
- Location Manager
- Social Media
- Subscription Zusatzfunktion The creation of companies is possible.
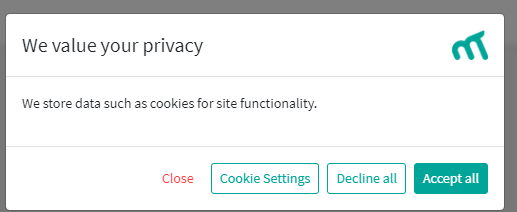
Cookie settings
Cookies can be configured and edited in two places in Markee. This can be done on the one hand in the user overview and on the other hand by each user in his or her user profile. The procedure is the same for both ways.
Procedure
1. click on the button "cookie settings" to access the settings.
2. You can now edit the cookie settings here.
3. Information regarding the cookies and an individual setting is possible via the button "Cookie settings".
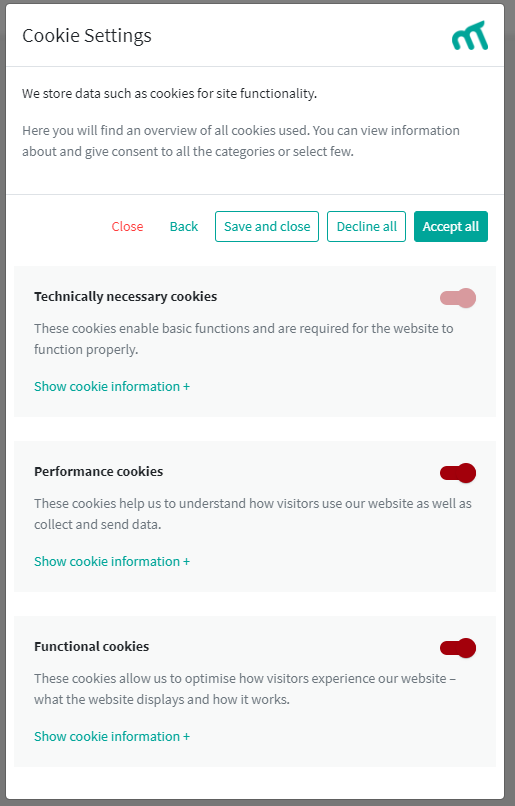
The cookie settings are saved for 1 year. After this time period, the settings are re-requested via a pop-up. The settings remain saved during this period even if the browser cookies are deleted. If the settings are changed within the year, the cookie settings will be requested again from this day 1 year in the future. Example: On 12.6 the cookies are set and the 1 year begins to run. But the user changes the settings again on 30.09.. In this case, the cookie settings are only queried on 29.09. of the following year.
Self-service user
Beside the normal agency user, self-service users are also available. These are users who have registered in SelfService. This user has the possibility to set their notifications in their SelfService profile. The User can deactivate all of these by deactivating the slider next to "E-mail notifications". Alternatively, the user can also activate or deactivate the individual notifications.
A Selfservice user can also log in to Markee with their Selvservices user data.